Today’s post is all about workflows! I’ve been using 17hats as our client management software for almost two years now but I’ve never really blogged about it. I love 17hats for many of its features, and one of my favorites is for its ability to manage my workflows. There is a lot that happens behind the scenes of any business and having a system to keep track of all the different moving parts is key. When we first started our business, I managed everything pretty much in my head until I realized I needed a better system to keep track of things. When you’re shooting around 28-30 weddings a year and photographing 30-35 newborns a year, things can start getting really crazy if you don’t have a good system. Thanks to 17hats, I’m able to manage contracts, invoices, workflows and more, and I really don’t know what I’d do without it! I love many of its features, but one of my favorites is its Workflows features. Here is how you can use this feature to streamline your workflows, too.

A peek into our workflows
Before you begin to create your workflow in 17hats, it’s important to first identify the phases and steps of a client project. For example, my wedding workflow is divided into four phases: Pre-wedding, Post-wedding, Post-gallery delivery, and Album Design. Each one of those phases includes several to-do items and actions that include emails, questionnaires, and general workflow items. Sitting down to list out the steps you take to complete a project is key to streamlining processes and making sure that each action is completed.
What is a phase?
A phase allows you to group your tasks into smaller segments. This makes it easier to manage everything that needs to be done throughout the project. Each phase includes the following:
- items to do outside of 17hats that can be checked off the list as you complete them
- emails that can be sent either automatically or manually
- questionnaires that can be sent either automatically or manually
Pre-Wedding Phase
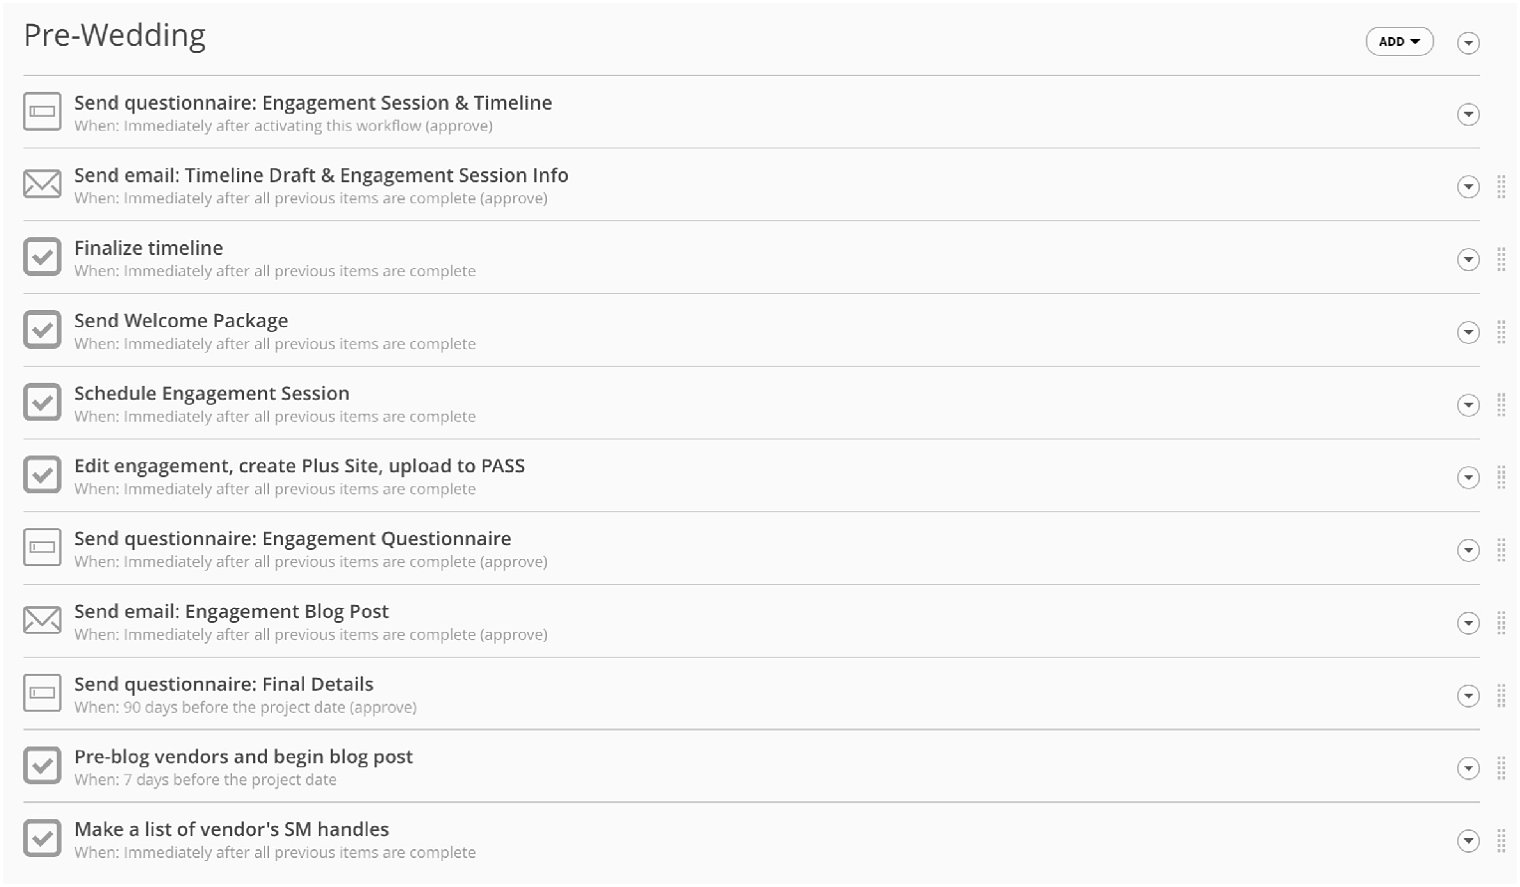
This first phase in my workflow keeps track of everything that takes place before the wedding day. The workflow begins after the client has already accepted their quote, signed the contract, and paid their invoice. I used to begin my workflow with sending a quote, contract, and invoice but this year I split that part off of the on-boarding process so that when I make changes to my workflow, I only have to update one rather than update each workflow under each contract type. As you can see in the screenshot below, my main wedding workflow starts with a questionnaire that I use to gather details about scheduling the engagement session and creating the wedding day timeline and ends with preparing the blog post and gathering vendor social media handles.

Post-Wedding Phase
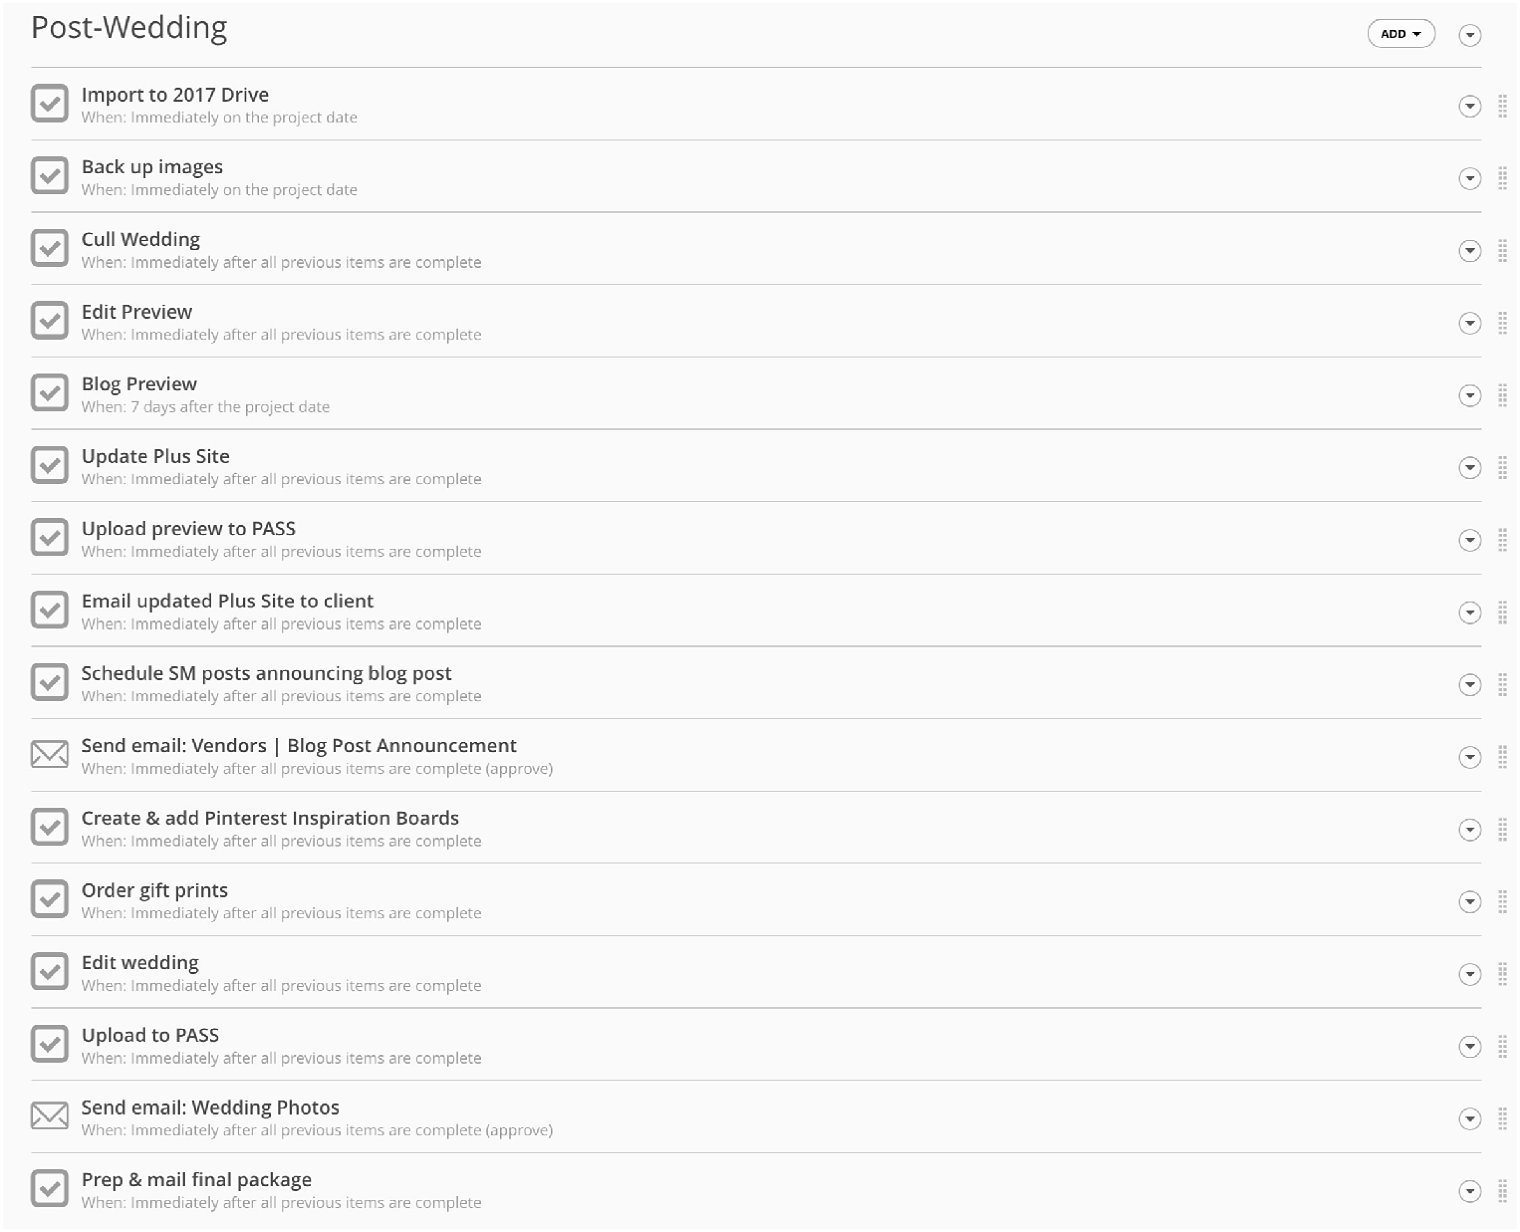
The second phase begins on the night of the wedding and ends with the delivery of the gallery. It includes backing images up, culling, editing, client and vendor notifications, and image delivery. It’s important to really analyze your workflow when creating this phase because it’s such an important part of the workflow! It is also one that can get out of hand if you add too many items to the workflow. For items that I know I need to do, I don’t add them in. For example, I always share a preview image on Instagram so I don’t need to remind myself to do that specifically. Pinterest, however, requires a few more steps and I’m likely to forget them if I don’t add them to the workflow so those I do include in my workflow. This phase is completed as soon as all images are delivered. Here is what this phase looks like in my workflow:

Post-Gallery Delivery Phase
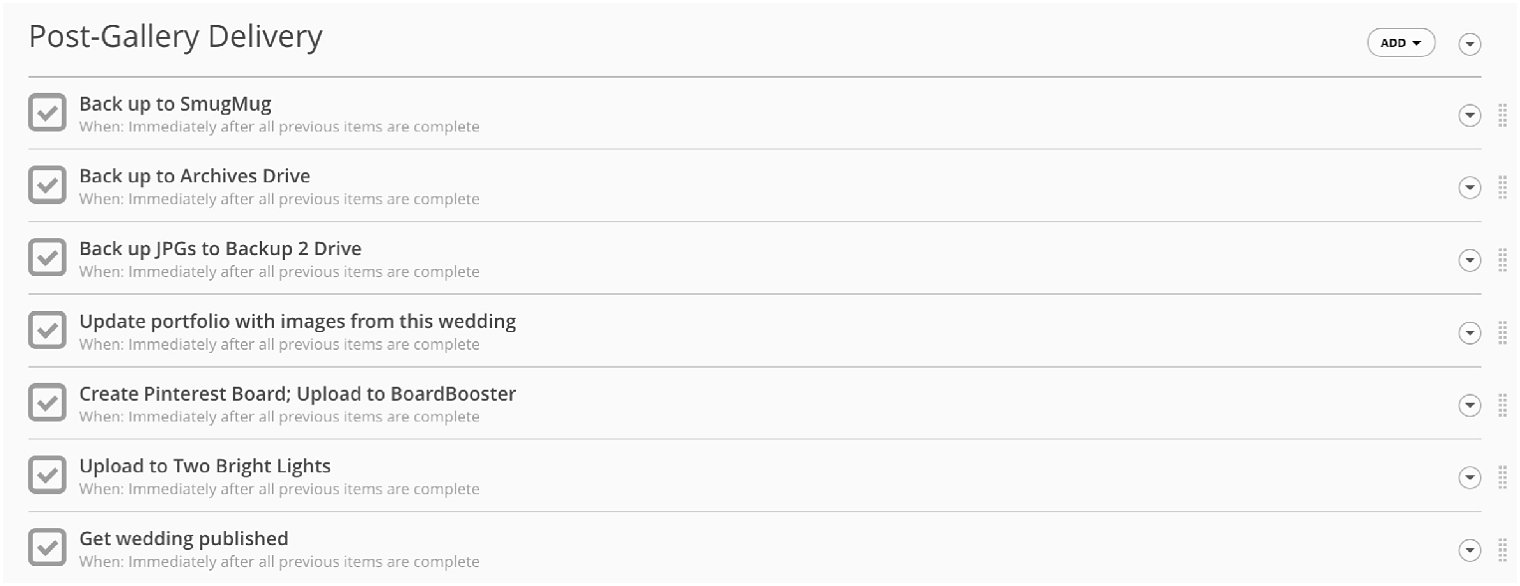
The third phase in my workflow includes a lot of behind-the-scenes work such as backing up images, adding more promotions on social media, and setting the wedding up for getting it published. This phase doesn’t end until I’m able to get the wedding published or decide it’s not a good fit for publication, in which case I can delete those steps in the specific client’s workflow without changing the workflow template.

Album Design Phase
The final phase in my client workflow for weddings is regarding album design. There are many steps involved in album design but I just keep track of the important ones in here.

And there you have it! I hope this post was helpful to you in streamlining your own processes. Have a comment or question? Leave me a note below and I’ll be sure to answer it!
Interested in other ways to streamline your workflows? Click below!
How to Speed Up Your Culling Workflow
How to Save Valuable Time Every Single Day
Seven Must-Have Checklists for Photographers
A Tool for Getting to Know Clients and Vendors
